Group Name: CS2103T-F14-4
By: Chee You, Rushagrid Kunthamas, Sam Yong Jek, Song Tianyi, Tan Jun Bang
Since: Jun 2016 Licence: MIT
- 1. Introduction
- 2. Getting Started
- 3. Features
- 3.1. General Commands
- 3.2. Task Management Commands
- 3.2.1. Add a delivery task:
addT - 3.2.2. Edits a delivery task :
editT - 3.2.3. Automatically scheduling a task:
suggest - 3.2.4. Manually assigning a task:
assign - 3.2.5. Removing assigned driver from a task:
free - 3.2.6. Mark a delivery task as completed:
done - 3.2.7. Gets the details of a delivery task / driver / customer:
read - 3.2.8. Deletes a delivery task / driver / customer:
del - 3.2.9. Views completed delivery tasks delivered by Driver
- 3.2.10. Saves assigned delivery tasks for a specific date into PDF document:
savepdf
- 3.2.1. Add a delivery task:
- 3.3. Customer Management Commands
- 3.4. Company Commands
- 4. Saving the data
- 5. FAQ
- 6. Appendix
1. Introduction
Deliveria is a desktop application that allows a delivery manager to manage and assign delivery tasks efficiently. While it consists of a Graphical User Interface (GUI) that is user-friendly, Deliveria is optimized for those who prefer to work with a Command Line Interface (CLI) which allows fast management of the delivery tasks in an organisation.
2. Getting Started
2.1. Installing
-
Ensure you have Java 11 or above installed in your Computer.
-
Download the latest release here.
-
Copy the file to the folder you want to use as the home folder for your Deliveria.
-
Double-click the file to start the app. The GUI should appear in a few seconds.
2.2. Scheduling Your First Task
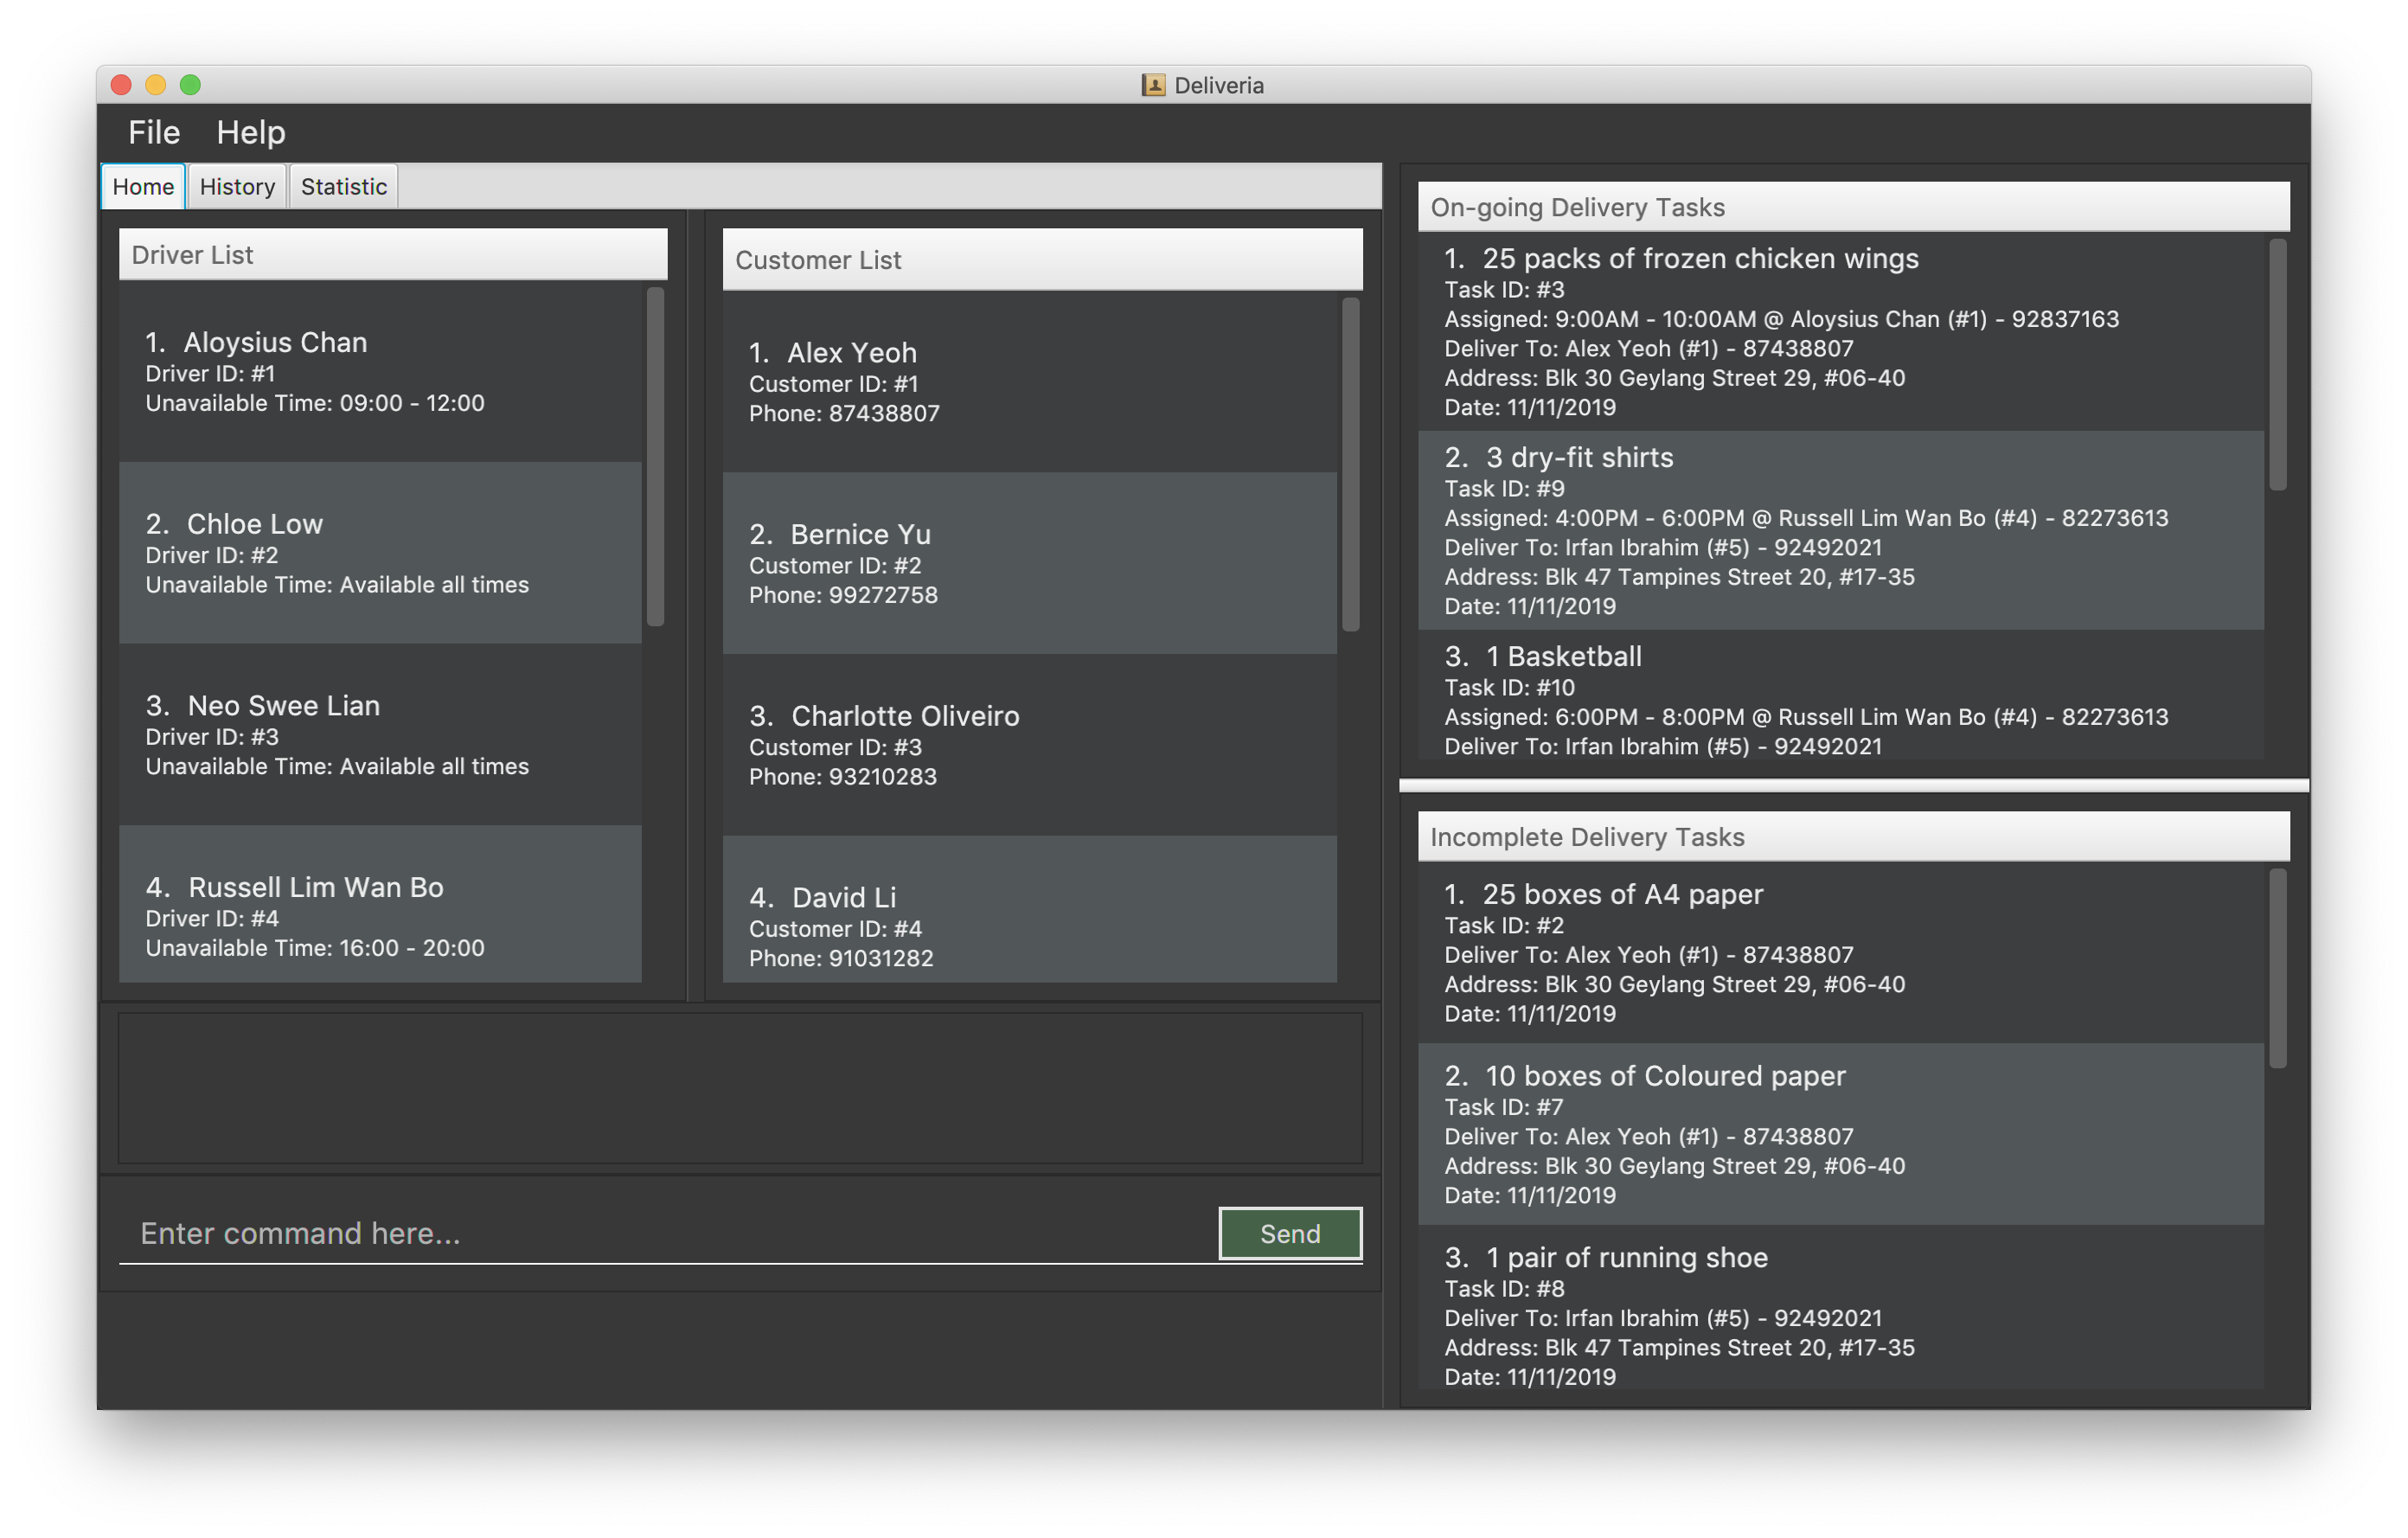
Now you are in! We have prepared a few sample customers and drivers for you to play around.
On a busy day, you might be having many orders coming in, and you want to get your drivers busy delivering them. Let’s go through the process of creating and assigning a task.
-
Create a new task by typing
addT g/20 boxes of utensils c/1 dt/22/11/2019in the command box. You need to substitute22/11/2019with the date today. Press Enter to execute the command. -
You can see the newly created task in the Incomplete Delivery Task box:
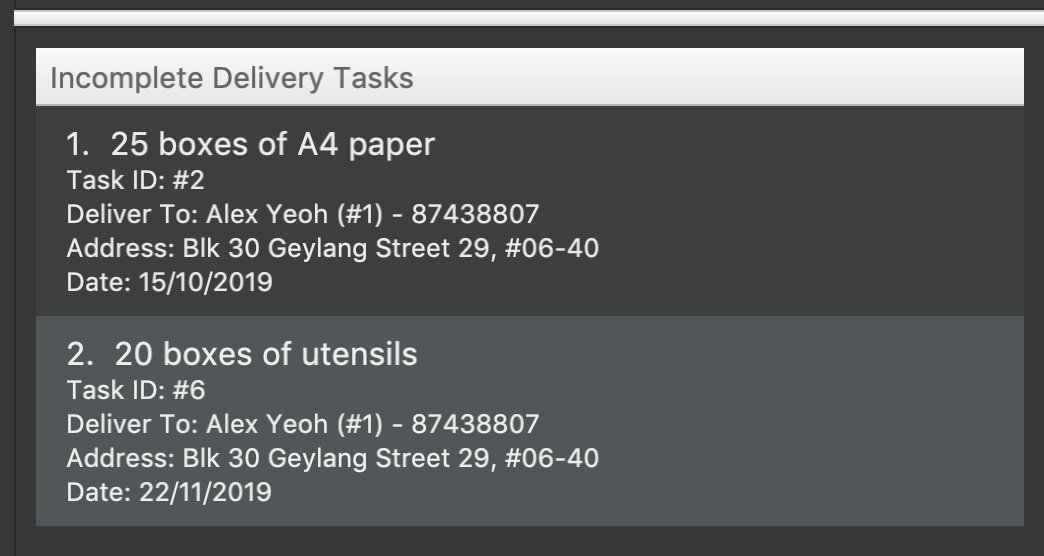
| Take note of the Task ID (i.e. #6), which is used to refer to this task. |
-
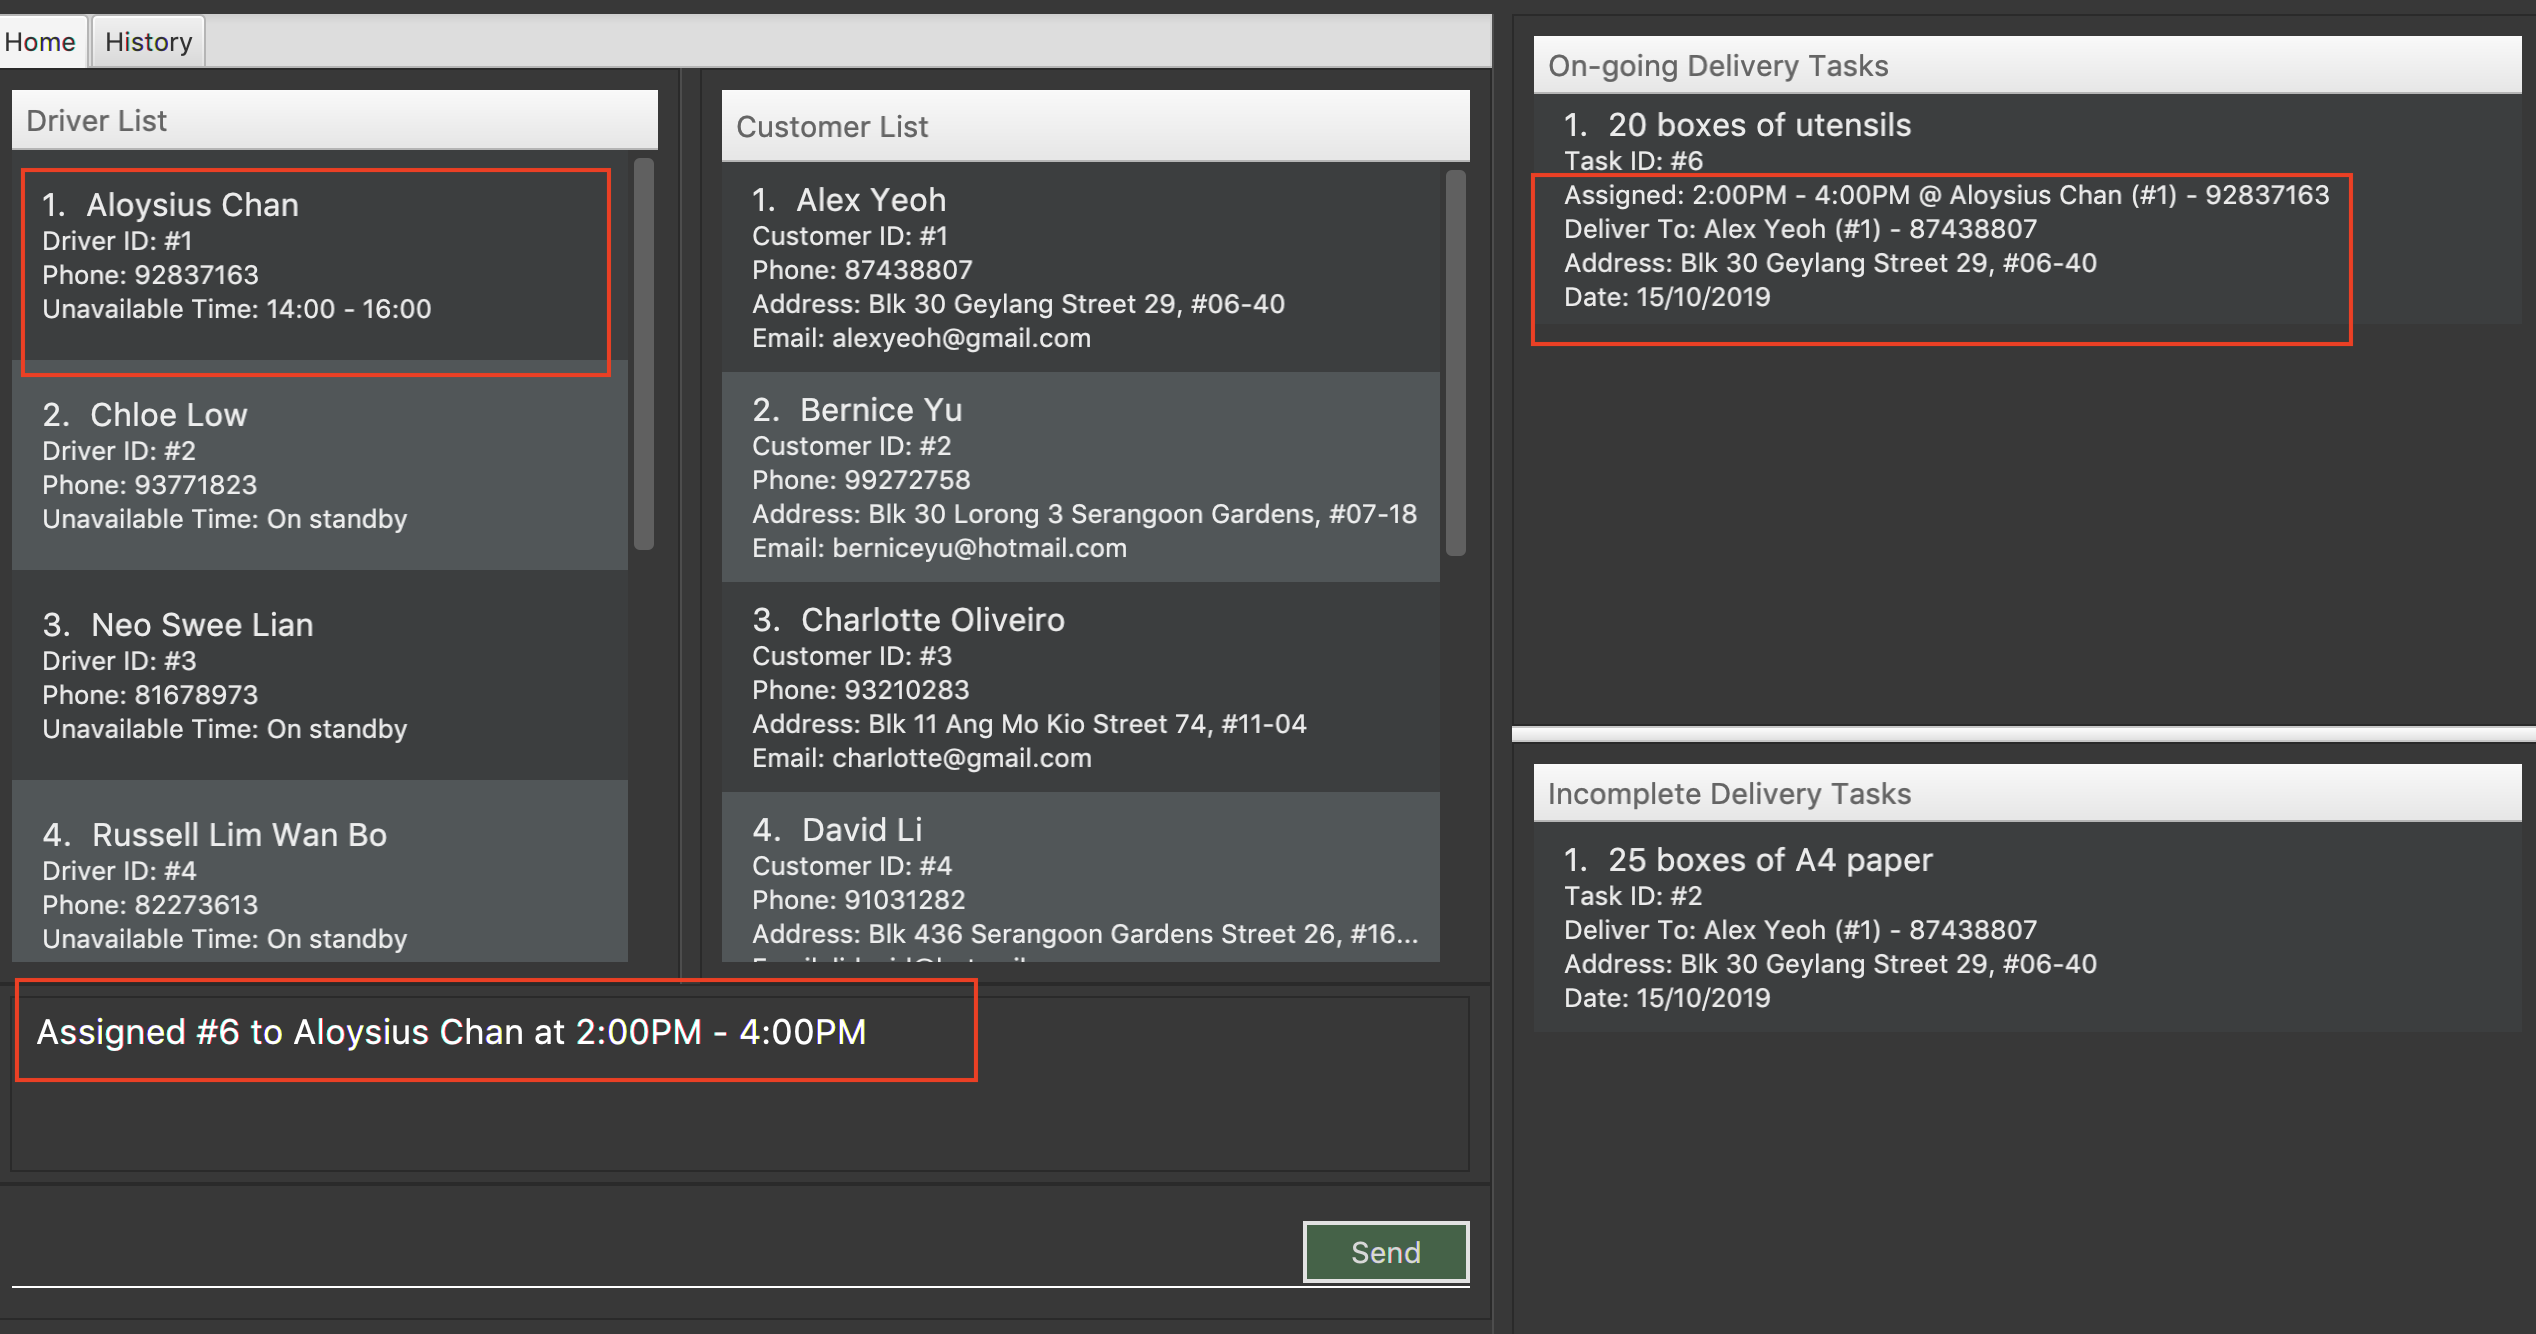
Execute command
suggest 2 t/6, where-
2is the number of hours that you estimate this task will take to complete -
6is the ID of the task that you want to assign
-
-
You can see Task #6 is assigned to Aloysius Chan at 2:00PM - 4:00PM
| The suggested time slot will either start from now or in the future. |
We will optimize the driver and the time based on the drivers' availability and the task.
Learn more about the rule in Section 3.2.3, “Automatically scheduling a task: suggest”
|
-
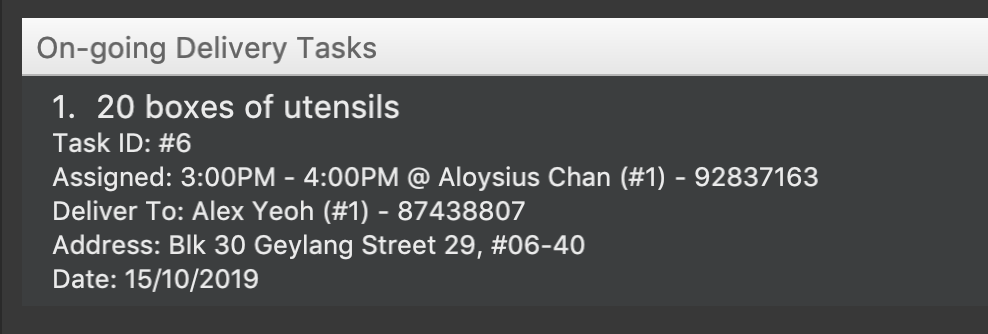
If you are not satisfied with the suggestion, you can overwrite it by typing
assign force t/6 d/1 at/1500 - 1600, where:-
6is the Task ID -
1is the Driver ID -
1500 - 1600is the time that you want to change to
-
Learn more about the assign command in Section 3.2.4, “Manually assigning a task: assign”
|
-
We now have rescheduled the task to 3-4 pm.
| The drivers, by default, works from 9 AM to 9 PM. You cannot assign a time beyond the working hours. |
You have created and scheduled your first task! Refer to Section 3, “Features” for details of each command.
3. Features
Command Format
-
[action] [parameter 1] [parameter 2] [parameter 3]
-
Parameter consists of a delimiter and a word.
For example, to edit the description of the delivery task (Task ID:3) :editT 3 g/50 packs of frozen chicken -
Commands are case sensitive
-
Order of parameter is can be reordered freely.
3.1. General Commands
3.1.1. Viewing help : help
List all available commands
Format: help
==== Navigate between tabs : go
Navigates to the specified tab Tl state.
Format: go [TAB_NAME]
Examples:
-
go statistic -
go home==== Lists all Task / Driver / Customer :list
Displays all Task / Customer / Driver list in it’s original state.
Format: list
3.1.2. Exiting the program : exit
Exits the program.
Format: exit
3.2. Task Management Commands
3.2.1. Add a delivery task: addT
Adds a delivery task to the task manager.
Format: addT [g/DESCRIPTION OF GOODS] [c/CUSTOMER ID] [dt/DATE OF DELIVERY]
Examples:
-
addT g/100 frozon boxes of red grouper c/13 dt/10/12/2019 -
addT g/1x washing machine c/10 dt/12/1/2020
3.2.2. Edits a delivery task : editT
Edits a existing delivery task in the task manager.
Format: editT [TASK ID] [g/DESCRIPTION OF GOODS] [c/CUSTOMER ID] [dt/DATE OF DELIVERY]
Examples:
-
editT 3 g/50 frozen boxes of catfish
Edits the description of the task (Task ID: 3) to be50 frozen boxes of catfish. -
editT 5 c/2 dt/10/12/2019
Edits the customer and date of delivery of the task (Task ID: 5) to beCustomer (Customer ID: 2)and10/12/2019respectively.
3.2.3. Automatically scheduling a task: suggest
Find the most suitable driver and an available time slot to schedule a task, based on the following rules.
-
If there are drivers who deliver to the same customer as the one in this task, the driver who has the earliest available time slot for this task will be selected.
-
If the above rule fails to select a driver, the system will choose among all drivers, and find the driver who has the earliest available time slot for the task.
Format: suggest HOURS t/TASK_ID
Examples:
-
suggest 2 t/1
Find the best driver, using the rules above, who has a two-hour time slot to deliver Task #1. -
suggest 1:20 t/2
Find the best driver, using the rules above, who is available for 1 hour and 20 minutes to deliver Task #2.
3.2.4. Manually assigning a task: assign
Assign a driver to a task with a proposed time.
Format: assign [force] t/TASK_ID d/DRIVER_ID at/hMM - hMM
Examples:
-
assign t/1 d/1 at/900-1200
Schedule Task #1 from 9 am to 12 pm, and assign it to Driver #1. -
assign force t/2 d/1 at/1600-1700
Schedule task #2 from 4 pm to 5 pm, and assign it to driver #1, regardless whether the task is already assigned.
3.2.5. Removing assigned driver from a task: free
Remove the time slot and driver from a task, and free the driver from this time slot in their schedule.
Format: free t/TASK_ID
Examples:
-
free t/1
Remove the assigned driver and time slot from the task, and free the driver’s schedule.
3.2.6. Mark a delivery task as completed: done
Mark a delivery task as completed.
Format: done [TASK ID]
Examples:
-
done 2
Marks the delivery task with Task ID 2 as COMPLETED.
3.2.7. Gets the details of a delivery task / driver / customer: read
Gets the details a task / driver / customer.
Format: read [c/CUSTOMER ID] | read [t/DRIVER ID] | read [t/TASK ID]
Examples:
-
read t/3
Gets the details of task (Task ID: 3). -
read d/2
Gets the details of driver (Driver ID: 2).
3.2.8. Deletes a delivery task / driver / customer: del
Deletes a task / driver / customer from its respective managers.
Format: del [c/CUSTOMER ID] | del [t/DRIVER ID] | del [t/TASK ID]
Examples:
-
del t/1
Deletes task (Task ID: 1) from the task manager. -
del d/2
Deletes driver (Driver ID: 2) from the driver manager. ==== Views completed delivery tasks delivered to Customer
Displays a list of completed tasks delivered to the customer, located in the completed delivery list under History tab.
Examples:
-
viewC 1
View the tasks delivered to the customer (Customer ID: 1).
3.2.9. Views completed delivery tasks delivered by Driver
Displays a list of completed tasks delivered by the driver, located in the completed delivery list under History tab.
Examples:
-
viewD 1
View the tasks delivered by the driver (Driver ID: 1).
3.2.10. Saves assigned delivery tasks for a specific date into PDF document: savepdf
The PDF document is arranged in a table format to allow easy reference of the delivery tasks that is assigned to each drivers for the date.
Its purpose is for user reference and archive.
Refer to [PdfLayout] for sample.
Format: savepdf [DATE]
Examples:
-
savepdf pdf/order
Saves the delivery orders in PDF format for today. -
savepdf pdf/summary dt/15/11/2019
Saves the task summary in PDF format for 15/11/2019.
3.3. Customer Management Commands
3.3.1. Add a Customer addC
Adds customer to the customer manager.
Format: addC [n/NAME] [p/PHONE] [e/EMAIL] [a/ADDRESS] [t/TAGS]
Examples:
-
addC n/John Doe p/98765432 e/johnd@example.com a/311, Clementi Ave 2, #02-25 t/friends
3.3.2. View full Customer details viewCW
Opens a separate window with all Customer details and a map showing location of Customer Address.
Format: viewCW CUSTOMERID
| Working internet connection and valid address is needed for map to work. |
Examples:
-
viewCW 1=== Driver Management Commands
3.3.3. Add a Driver addD
Adds driver to the driver manager.
Format: addD [n/NAME] [p/PHONE] [e/EMAIL] [a/ADDRESS] [t/TAGS]
Examples:
-
addD n/John Doe p/98765432 e/johnd@example.com a/311, Clementi Ave 2, #02-25 t/friends==== View full Driver detailsviewDWOpens a separate window with all Driver details
Format:viewDW DRIVERID
Examples:
-
viewDW 1
3.4. Company Commands
3.4.1. Updates the company’s information: update
Updates the information of the company so that it can be displayed in the Delivery Order PDF.
Refer to savepdf command on how to generate Delivery Order PDF.
Format: update [n/NAME] [a/ADDRESS] [p/PHONE] [f/FAX] [e/EMAIL] [r/CO REG. NO.] [gst/GST REG. NO]
Examples
-
update n/Fast Supply Pte Ltd p/67331928
Updates the company’s name to "Fast Supply Pte Ltd" and phone no to "67331928". -
update r/18387752B gst/-
Updates the company’s registration number to "18387752B" and remove GST registration number.
4. Saving the data
Deliveria data are saved in the hard disk automatically after any command that changes the data.
There is no need to save manually.
5. FAQ
Q: How do I transfer my data to another Computer?
A: Install the app in the other computer and overwrite the empty data file it creates with the data file in your previous computer.
Q: Where is the saved file at?
A: It is located in the same folder where the .jar file is.
There will be a folder called data.
Q: How do I know the list of commands?
A: The help command will give a list of available commands.
6. Appendix

savepdf command.
savepdf command.